Below is the Mercedes Benz Command NTG 4.0 / 4.5 Android navigation installation wire-diagram, you can check the instructions below to learn details of each steps.
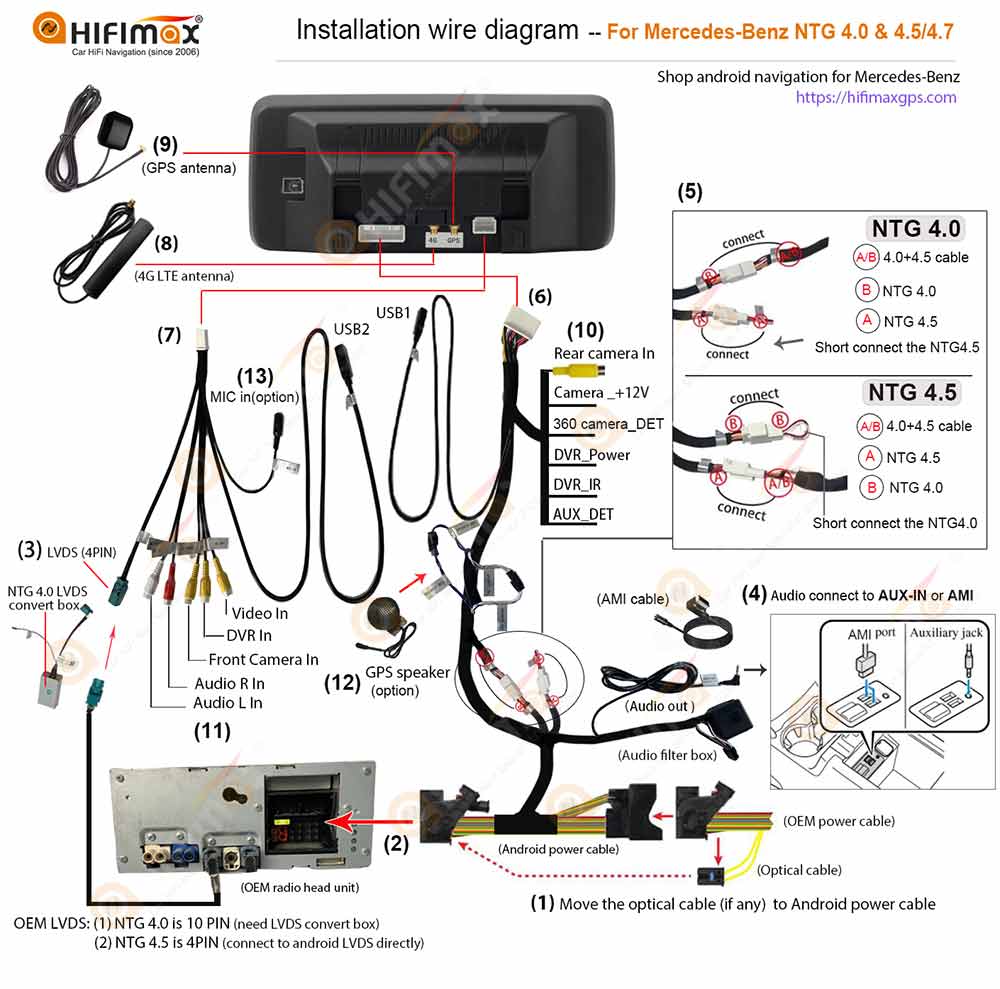
Instructions
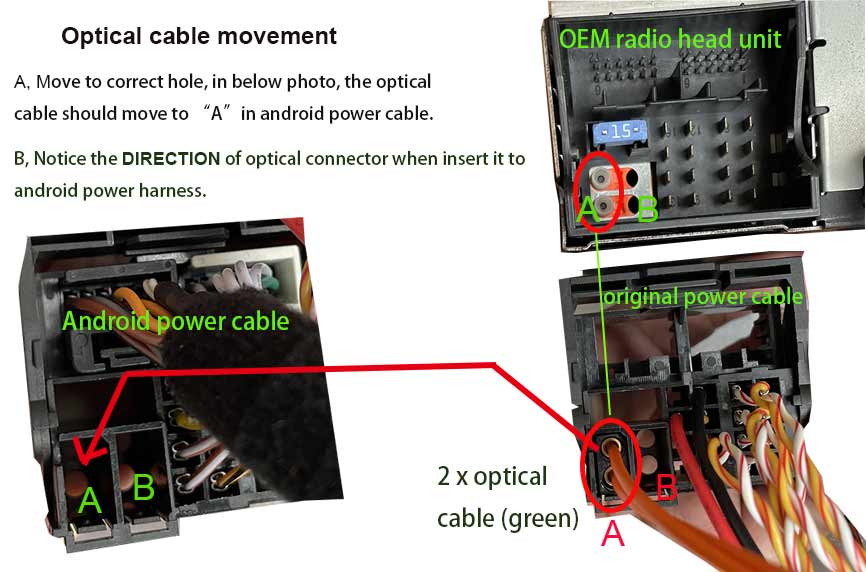
(1) Move the optical fiber cable (if any).
If the car with optical cable in original harness, it need to move the optical cable to android power harness. Please notice: when you move the optical cable, move it to correct hole & notice it's direction. Watch the video demo
(2) Connect the android power cable (female connector) to original radio head unit
(3) LVDS connection:
If the car is Mercedes NTG 4.0, the original LVDS is 10 pin, it needs to connect it to the LVDS convert box before connecting to the LVDS (4 pin) from android screen.
Please notice, there is a power cable (ACC +12V ) on the LVDS convert box, it connect to the "DVR-POWER" from android power cable.
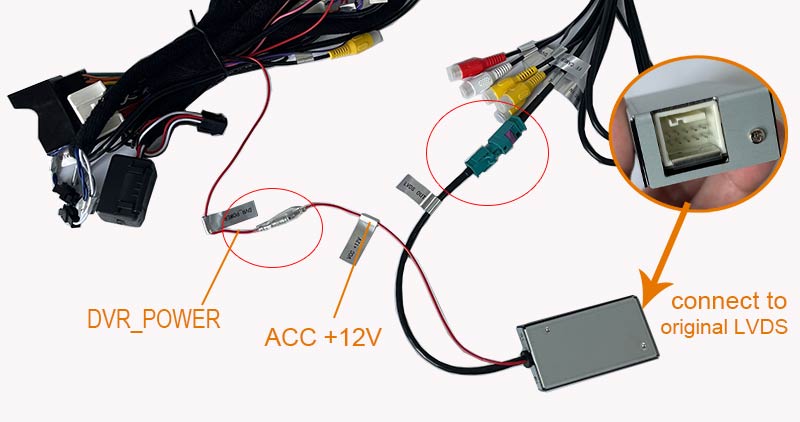
If your car is NTG 4.5, it will connect to LVDS from android screen directly!
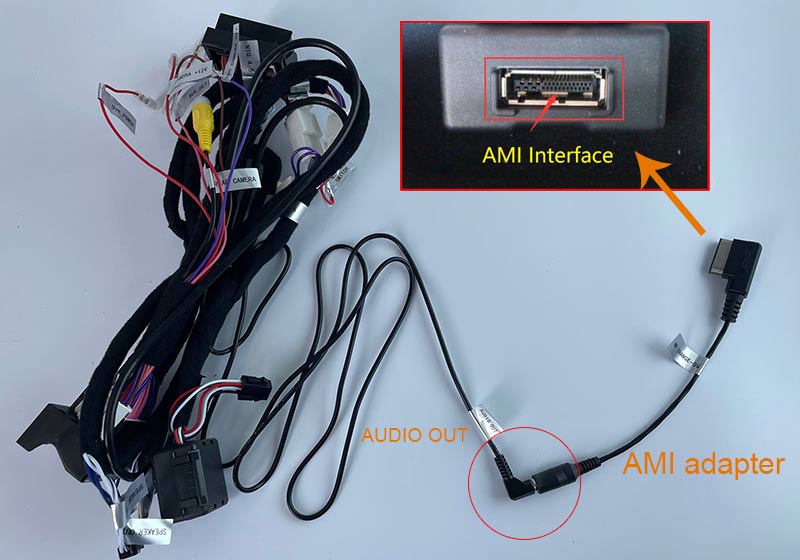
(4) The audio connection for android screen:
If your car contains an AUX-IN (Auxiliary jack), it just connect to AUX directly. But if your car contains AMI port (without AUX-IN), it need to connect to AMI cable first, then connect the AMI cable to AMI port in the car.
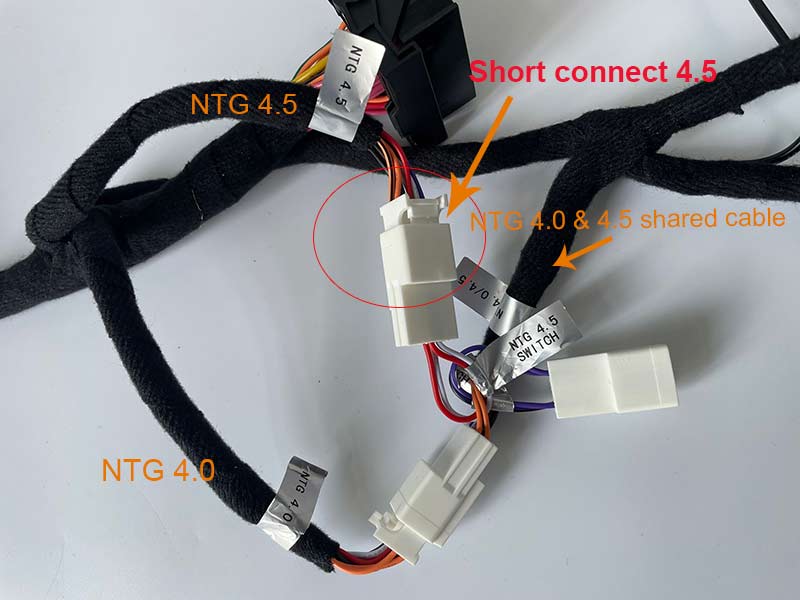
(5) NTG 4.0 & NTG 4.5 shared power cable.
Just connect the cable according to the wire-diagram, then will be fine.
the power cable offer 2 pcs connectors for short circuit.
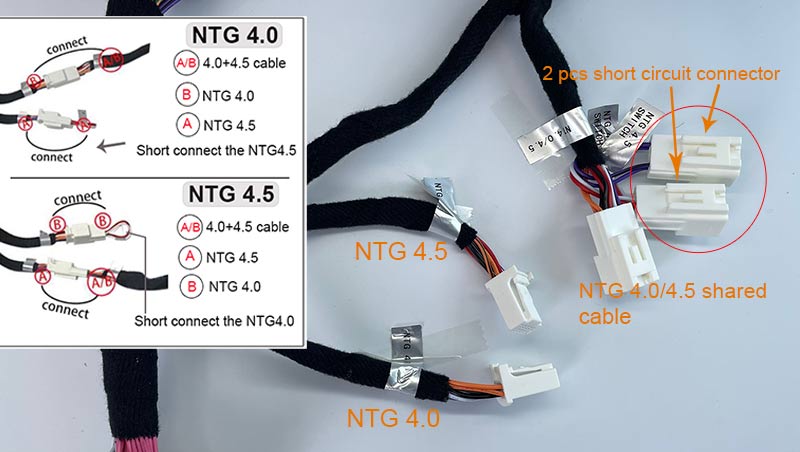
For exmple, if your car is NTG 4.0 , you should connect the cable as below.
(Connect the NTG 4.0 cable to 4.0/4.5 shared cable, after that, short connect the NTG 4.5 connector).
(6) (7) Connect the power / RCA cable to android screen.
(8) Connect the 4G LTE antenna
(9) Connect the GPS antenna, DON'T use GPS spliter!
You have to install install the GPS antenna we offered, don't use the GPS spliter
(Some installer / reseller might suggest you to install the GPS spliter, in order to share your original GPS antenna for android GPS, but we don't recommend this way, since it might burn down the android GPS chips, when it was burn down, you have to return it back to manufacturer for repair, this is big trouble!)
(10) Backup camera (optional)
If you install the aftermarket backup camera, please notice: you should get the power from android screen (instead of connecting to reverse light), In the android power cable, it contains a "Reverse +12V", this cable is the power for backup camera.
If you install the 360 degree backup camera, you should connect the " 360 camera_DET", this is the power for 360 backup camera.
(11) Video in / DVR and other RCA input (optional)
(12) GPS speaker (optional)
If your car contains a dash speaker(middle speaker), that way, then should install this small speaker (to avoid noise in speaker).
(13) External MIC in (optional)
During installation, you can take a test for the Bluetooth function, the android screen contains built-in MIC, if you feel the built-in MIC is not so good, then you can install external MIC (We offer it as a gift).